INDEX Precautions Important Safety Instructions Notice Copyright Disclaimer Trademarks...
|
|
|
- Jonas Dahlberg
- för 10 år sedan
- Visningar:
Transkript
1
2

3 INDEX INDEX... 3 Precautions Important Safety Instructions Notice Copyright Disclaimer Trademarks... 6 Before You Begin Main Features Accessories... 8 Hardware Description Front Panel Configuration VFD(Vacuum Fluorescent Display) Rear Panel Configuration Remote Control Unit Connecting diagram Receiver to A/C power Receiver to TV with Digital A/V Output Receiver to TV with Analog A/V Output Receiver to TV and VCR Connecting to Antenna Cable In case of S2 + S2 (Satellite + Satellite) tuners In case of T(T2) + T(T2) (Terrestrial + Terrestrial) tuners In case of C + C (Cable + Cable) tuners In case of S2 + T(T2) (Satellite + Terrestrial) tuners In case of S2 + C (Satellite + Cable) tuners In case of T(T2) + C (Terrestrial + Cable) tuners Guide of Functions Selecting a Service Using CH UP/DOWN buttons Using Service List Using Simple Service List Using Recent Service List Information Window Multi-Picture Display Electronic Program Guide (EPG) Favorite Group Volume Control Pause Subtitle Audio Control Teletext PIP (Picture in Picture)... 26
 tuners... 19 5.2 In case of T(T2) + T(T2) (Terrestrial + Terrestrial) tuners... 20 5.3 In case of C + C (Cable + Cable) tuners... 20 5.4 In case of S2 + T(T2) (Satellite + Terrestrial) tuners.")
4 PVR (Personal Video Recorder) Function Recording Recording methods Recording Edit Long Time recording Pause during recording Time Shifting Playback (Play List) Recorded Files Imported Files Music Photo Bookmark Trick mode Menu Map Main Menu of Guide System Tools Storage Manager Timer Settings Service List Manager Data Transfer Configuration Recording Option Parental Control Display Setting Time Setting Language Setting A/V Output Setting Installation Dish Setting Positioner Setting Service Search Network Setting System Recovery System Information Utility Calculator Calendar CAS (Conditional Access System) Plugin YouTube Troubleshooting Specifications... 58

5 Precautions 1. Important Safety Instructions Read these instructions. Keep these instructions. Heed all warnings. Follow all instructions. Do not use this apparatus near water. Clean only with dry cloth. Do not block any ventilation openings. Install in accordance with the manufacturer s instructions. Do not install near any heat sources such as radiators, heat registers, stoves, or other apparatus (including amplifiers) that produce heat. Do not reverse the safety purpose of the polarized or grounding-type plug. A polarized plug has two blades with one wider than the other. A grounding type plug has two blades and a third grounding prong. The wide blade or third prong is provided for your safety. If the provided plug does not fit into your outlet, consult an electrician for replacement of the obsolete outlet. Protect the power cord from being walked on or pinched particularly at plugs, convenience receptacles, and the point where they exit from the apparatus. Only use attachments/accessories specified by the manufacturer. Use only with the cart, stand, tripod, bracket, or table specified by the manufacturer, or sold with the apparatus. When a cart is used, use caution when moving the cart/apparatus combination to avoid injury from tip-over. Unplug this apparatus during lightning storms or when unused for long periods of time. Refer all servicing to qualified service personnel. Servicing is required when the apparatus has been damaged in any way, such as power-supply cord or plug is damaged, liquid has been spilled or objects have fallen into the apparatus, the apparatus has been exposed to rain or moisture, does not operate normally, or has been dropped. WARNING : To Prevent fire or shock hazard do not expose the set to rain or moisture. 2. Notice These servicing instructions are for use by qualified service personnel only. To reduce the risk of electric shock, do not perform any servicing other than that contained in the operating instructions unless you are qualified to do so. The apparatus shall not be exposed to dripping or splashing and that no objects filled with liquids, such as vases, shall be placed on the apparatus. The mains plug is used as the disconnect device. The disconnect device shall remain readily operable.

6 To reduce the risk of electric shock, do not remove the cover (or back). No user serviceable parts are inside. Refer servicing to qualified service personnel. The Lightning Flash with arrowhead symbol within an equilateral triangle, is intended to alert the user to the presence of un-insulated "dangerous voltage" within the product enclosure that may be of sufficient magnitude to constitute a risk of shock to persons The exclamation point within an equilateral triangle is intended to alert the user to the presence of important operating and maintenance (servicing) instructions in the literature accompanying the product 3. Copyright This manual is protected by copyright laws. Copy, use and reproduction of this manual in part or whole without Manufacturer s prior written approval are prohibited. 4. Disclaimer The manufacturers, distributors and agents are not liable to any kind of damage caused by the use of the information contained in this manual. The instruction and descriptions which this manual contains are based on the time of this manual's production. The manufacturer constantly updates it with new functions and technology. All the specifications are subject to change without prior notice. 5. Trademarks HDMI, the HDMI logo and High-Definition Multimedia Interface are trademarks or registered trademarks of HDMI Licensing LLC Manufactured under license from Dolby Laboratories. Dolby and the double-d symbol are trademarks of Dolby Laboratories.
 instructions in the literature accompanying the product 3. Copyright This manual is protected by copyright laws.")
7 Before You Begin 1. Main Features For the feature of DVB-S/S2, Satellite tuner only Supports MPEG4 /MPEG2 - HD/SD and Fully DVB-S2 /DVB-S Compliant Intelligent Blind Scan for both SD and HD TV & Multi-Satellite Search Multi-LNB Controlled by DiSEqC Control Version 1.0, 1.1, 1.2 and USALS For the feature of DVB-C, Cable tuner only Supports MPEG4 /MPEG2 - HD/SD and Fully DVB-C Compliant For the feature of DVB-T, Terrestrial tuner only Supports MPEG4 /MPEG2 - HD/SD and Fully DVB-T Compliant For the feature of DVB-T2, Terrestrial tuner only Supports MPEG4 /MPEG2 - HD/SD and Fully DVB-T2 Compliant Common features for all types of DVB receivers Twin Tuner HDTV PVR Receiver ( H.264/ MPEG4 HD ) Embedded Linux OS Time Shifting, Recording & Playback with Internal HDD (SATA) / External HDD (E-SATA or USB 2.0) Simultaneously Records of 3 Services and allows Watching 2 others (PIP) Powerful Extended EPG supports and Event Recording Three USB 2.0 Host ports (MP3 Player & JPEG Viewer) Xvid file play back supported Ethernet port Supported Premium Grade White VFD Display (12 Digit Alphanumeric) Premium Grade Universal remote control unit On-Screen Display with Full Color & Resolution Favorite Groups Powerful Service List Manager for Favorites, Lock, Skip, Move, Edit and Delete Service Sorting by Alphabet, Transponder and CAS User Friendly & Multi-language Supported (OSD & Menu) Teletext / Subtitle Supported Maximum 10,000 Services(TV & Radio) Programmable Picture-in-Picture (PIP) & Multi-picture Display Parental Lock / System Lock / Installation Lock HDMI Video & Audio Output (576i, 576p, 720p, 1080i, 1080p) Supports Y/Pb/Pr(component) Output in HD CVBS(composite) Video & Audio Output via RCA CVBS, RGB, Y/C Video & Audio Output via TV SCART Optical Output for Digital Audio(SPDIF) Software & Service channel Database upgrade via USB & RS-232C port 2 Smart card reader and 2 Common Interface Slots 1W Stand-by Power Consumption

8 2. Accessories User's Manual Remote Control AAA size Batteries X2 HDMI Cable Loop through Cable AC Power Cord NOTE : If any accessories listed above are missing, contact the sales representative where you purchased this unit.

9 Hardware Description 1. Front Panel Configuration 1. POWER BUTTON : Press to switch between STANDBY and POWER ON modes. 2. Vol Up/Down BUTTON : Press to change audio volume in normal mode or to navigate menu in menu mode. 3. CH Up/Down BUTTON : Press to change services in normal mode, or to move highlighted-bar in menu mode. 4. Remote Sensor : Receives signal from remote controller. 5. VFD Display : The VFD consists of 12-digit letter. These letters display the current status of receiver such as service name, service information and so on. 6. USB (Front) : Use it when connecting to external USB storage device. 7. SMART CARD READER : Insert smart card for encrypted service access. 8. PCMCIA : To receive other pay-tv service you need a CA-Module(Viaccess, Irdeto, Nagravison, etc.) and a smart card from the service provider. 2. VFD(Vacuum Fluorescent Display) 1. Remote Indication LED : The LED lights on when a key on the Remote Controller is pressed. 2. Information : Display information including service name and other information.

10 3. Rear Panel Configuration Two tuners can be installed in different combination as follows. For the professional installation of these tuners, please ask your local agent or dealers for further assistance. 1. VCR SCART : Connects to the VCR or DVD using a VCR SCART cable. 2. TV SCART : Connects to the TV input using a TV SCART cable. 3. SPDIF : Connects to the audio system using a S/PDIF cable. (digital audio) 4. VIDEO : Connects to the TV or VCR using a RCA cable. (Composite video output / Yellow) 5. AUDIO L/R : Connects to the TV or VCR using a RCA cable. (Stereo audio output / White, Red) 6. Component : Connects to the TV or VCR using a component cable. ( YPbPr) 7. USB : Use it when connecting to external USB storage device. 8. HDMI : Connects to the TV by using a HDMI cable for the best quality picture and audio. 9. RS-232C : Serial port for firmware update and data transfer. 10. Ethernet : Local area network port for direct computer connection. 11. e-sata : Connects to the external HDD via e-sata cable. 12. A/C Switch : Power switch 13. A/C power cable socket : Connects to A/C power cord.
 5. AUDIO L/R : Connects to the TV or VCR using a RCA cable. (Stereo audio output / White, Red) 6. Component : Connects to the TV or VCR using a component cable.")
11 In case of S2 + S2 [ TUNER 1 ] 1. LNB IN (Caution : Socket on the left bottom) Satellite broadcasting signal input socket for the first tuner (TUNER 1). Connects a satellite antenna LNB cable. 2. LNB OUT Satellite broadcasting signal output socket through the first tuner (TUNER 1). Connects to a second tuner (TUNER 2) for loop-through. [ TUNER 2 ] 3. LNB IN (Caution : Socket on the right bottom) Satellite broadcasting signal input socket for the second tuner (TUNER 2). Connects a satellite antenna cable or from the first tuner (TUNER 1) LNB OUT connector. 4. LNB OUT Satellite broadcasting signal output socket through the second tuner (TUNER 2). Connects to another STB for loop-through. In case of T(T2) + T(T2) [ TUNER 1 ] 1. ANT IN Terrestrial broadcasting signal input socket for the first tuner (TUNER 1). Connects an aerial antenna. 2. LOOP OUT Terrestrial broadcasting signal output socket through the first tuner (TUNER 1). Connects to second tuner (TUNER 2) for loop-through. [ TUNER 2 ] 3. ANT IN Terrestrial broadcasting signal input socket for the second tuner (TUNER 2). Connects a aerial antenna cable or loopthrough cable from the first tuner (TUNER 1). 4. LOOP OUT Terrestrial broadcasting signal output socket through the second tuner (TUNER 2). Connects to another STB for loop-through. In case of C + C [ TUNER 1 ] 1. CABLE IN Cable broadcasting signal input socket for the first tuner (TUNER 1). Connects a cable antenna. 2. CABLE OUT Cable broadcasting signal output socket through the first tuner (TUNER 1). Connects to second tuner (TUNER 2) for loop-through. [ TUNER 2 ] 3. CABLE IN Cable broadcasting signal input socket for the second tuner (TUNER 2). Connects a cable antenna or loopthrough cable from the first tuner (TUNER 1). CABLE OUT Cable broadcasting signal output socket through the second tuner (TUNER 2). Connects to another STB for loop-through.
 LNB OUT connector. 4. LNB OUT Satellite broadcasting signal output socket through the second tuner (TUNER 2).")
12 In case of S2 + T(T2) [ TUNER 1 ] 1. LNB IN (Caution : Socket on the left bottom) Satellite broadcasting signal input socket for the first tuner (TUNER 1). Connects a satellite antenna LNB cable. 2. LNB OUT Satellite broadcasting signal output socket through the first tuner (TUNER 1). Connects to another STB for loopthrough. [ TUNER 2 ] 1. ANT IN Terrestrial broadcasting signal input socket for the second tuner (TUNER 2). Connects a aerial antenna cable. 2. LOOP OUT Terrestrial broadcasting signal output socket through the second tuner (TUNER 2). Connects to another STB for loop-through. In case of S2 + C [ TUNER 1 ] 1. LNB IN (Caution : Socket on the left bottom) Satellite broadcasting signal input socket for the first tuner (TUNER 1). Connects a satellite antenna LNB cable. 2. LNB OUT Satellite broadcasting signal output socket through the first tuner (TUNER 1). Connects to another STB for loopthrough. [ TUNER 2 ] 3. CABLE IN Cable broadcasting signal input socket for the second tuner (TUNER 2). Connects a cable antenna. 4. CABLE OUT Cable broadcasting signal output socket through the second tuner (TUNER 2). Connects to another STB for loop-through. In case of T(T2) + C [ TUNER 1 ] 1. ANT IN Terrestrial broadcasting signal input socket for the first tuner (TUNER 1). Connects a aerial antenna. 2. LOOP OUT Terrestrial broadcasting signal output socket through the first tuner. Connects to another STB for loop-through signal. [ TUNER 2 ] 3. CABLE IN Cable broadcasting signal input socket for the second tuner (TUNER 2). Connects a cable antenna. 4. CABLE OUT Cable broadcasting signal output socket through the second tuner (TUNER 2). Connects to another STB for loop-through.
 Satellite broadcasting signal input socket for the first tuner (TUNER 1).")
13 4. Remote Control Unit 1. POWER : Turns the STB On/Off. 2. MUTE : Turns the sound On/Off. 3. Numeric : Controls the numerical operation and service numbers directly. 4. Information : Shows the information box of the current program. If you press one more time, a detail information box will be shown. 5. Recall : Moves to previous service. 6. Menu : To enter the main menu or to move to the previous menu. 7. EPG(Electronic Program Guide) : Show the TV/Radio program guide. 8. Favorite : To display the satellites programmed into the receiver and the favorite groups. 9. ARROW Buttons a. Up & Down Key : To change the value of a selected item with preprogrammed values in menu. b. Left & Right Buttons : To move the cursor left and right in menu. 10. Teletext : To show the digital teletext. 11. Pause : This key is used to pause the video. Press once more to resume the video. 12. OK or Service List : Show the service list in non-menu mode and select an item or confirm in menu mode. 13. EXIT : Exit from the menu or pop-up window.

14 14. Volume Up & Down : To change the Volume. 15. Channel Up & Down: To change the TV or Radio service channel. 16. Page Up& Down : Move to the next or previous page if more than one page is available. This button also is change the location of sub picture in PIP. 17. Rewind : Rewinds at high speed. Each time you press this button the rewind speed is increased. 18. Play / Time shift : Display the progress bar of playback when no progress bar is displayed. Start playback with normal speed. Return to normal speed from trick mode. 19. STOP : To stop time shifting, play back or recording. 20. Fast Forward : Fasts forward at high speed. Each time you press this button the speed is increased. 21. Previous File : To play the previous MP3 file in MP3 play mode. This button is also used to jump back to beginning of recording during a playback. 22. Recording : To start Recording. 23. Play List : To show the file list in the SATA HDD or USB Storage Device. 24. Next File : To play the next file. This button is also used to jump to end of recording during a playback. 25. Color Buttons a. RED : Used for special function in menu. RED key is used to sort lists in service list or go to previous day search in EPG or make/delete the current position as a bookmark. b. GREEN : Used for special function in menu. GREEN key is used to set favorites setting in service list or go to the next bookmark position. c. YELLOW : Used for special function in menu. YELLOW key is used to find service in service list or change the audio track. d. BLUE : Used for special function in menu. BLUE key is used to set service list option in service list or display Multi-Picture.

15 26. PIP Buttons a. PIP(Picture in Picture) : To open the PIP window. b. PIP Swap : Switching between main-picture and sub-picture c. PIP(Picture in Picture) Service List : To shown the sub-picture service list. 27. Sleep : To adjust sleep timer. 28. Resolution : To select the resolution format. Each time you press the Resolution button, the resolution changes in the following sequence: 576i > 576p > 720p > 1080i > 1080p 29. TV/RADIO : Switches between TV and Radio. 30. Subtitle : To show multilingual subtitle. 31. Repetition (*): This key is used to play back a recording repeatedly. NOTE : (*) This button(repetition) will be supported later, by new s/w version by upgrading. Please refer to your local dealer / distributor.
: This key is used to play back a recording repeatedly.")
16 Connecting diagram 1. Receiver to A/C power Connect the A/C power cord between A/C power cord socket of receiver and A/C outlet. 2. Receiver to TV with Digital A/V Output Connect the HDMI Cable to the HDMI Connector of the TV. Connect SPDIF to Digital audio input of the equipment(digital Audio) NOTE : Depending on the A/V equipment you own, there are various ways you can connect the STB. To choose the best connection option, please refer to the manual of the equipment you would like to connect to. To get High Definition playback of High Definition content, we recommend that you connect your high definition display with a HDMI cable. HDMI supports standard, enhanced or high-definition video and multichannel audio in a single cable.

17 3. Receiver to TV with Analog A/V Output Connect the TV SCART to the SCART input of the TV. Connect the Component to the Component input of the TV. Connect the RCA to the RCA input of the TV. NOTE : The component connection(ypbpr) is recommended for Digital TV. The SCART cable connection is recommended for analogue TV or VCR The composite connection(rca cable) is recommended for analogue TV You cannot view high definition video with the SCART and the composite video connector.
 is recommended for")
18 4. Receiver to TV and VCR Connect the TV SCART to the SCART input of the TV. Connect the VCR SCART to the SCART input of the VCR.

19 5. Connecting to Antenna Cable 5.1 In case of S2 + S2 (Satellite + Satellite) tuners Connecting one dish to both tuners by Loop through Connecting each Dish to each Tuner Connecting Antenna cable to each Tuner using DiSEqC SW (Recommend)

20 5.2 In case of T(T2) + T(T2) (Terrestrial + Terrestrial) tuners Connecting one aerial antenna to both tuners by Loop through Connecting two aerial antenna to each Tuner 5.3 In case of C + C (Cable + Cable) tuners Connecting one broadcasting cable to both tuners by Loop through Connecting two broadcasting cable to each Tuner
 tuners Connecting one broadcasting cable to")
21 5.4 In case of S2 + T(T2) (Satellite + Terrestrial) tuners Connecting dish antenna to LNB IN of the tuner Connecting aerial antenna to ANT IN of the Tuner 5.5 In case of S2 + C (Satellite + Cable) tuners Connecting dish antenna to LNB IN of the tuner Connecting broadcasting cable to CABLE IN of the Tuner 5.6 In case of T(T2) + C (Terrestrial + Cable) tuners Connecting aerial antenna to ANT IN of the Tuner Connecting broadcasting cable to CABLE IN of the Tuner
22 Guide of Functions 1. Selecting a Service To select the desired service (channel), please refer to the instructions below. 1.1 Using CH UP/DOWN buttons You can navigate between services by pressing CH UP/DOWN buttons. Whenever you press the CH UP(DOWN) button, current service will be changed to next/previous service. Please press CH UP or CH DOWN button until you fine the service you want to watch. 1.2 Using Service List To select the desired service in the service list, you should firstly display the service list by pressing the OK button. Use the ARROW buttons to select a desired service and press the OK button. You can see that the service is changed in the small screen on the top-right. To watch that service, press the OK button once more. To watch the previous service, press the EXIT button. In the Service List window, you can also select additional functions with the COLOR buttons. Press the RED button, and you can sort the services by the Alphabet, Transponder(TP), Group, Tuner and CAS (Conditional Access System). Press the GREEN button, and you can add the services to one of 10 Favorite List. Press the YELLOW button, and you can search & find the service via a virtual keyboard. Press the BLUE button, and you can adjust service list option. NOTE : If you connect the tuner with a loop-through, you cannot use the sort list option. 1.3 Using Simple Service List If you press NUMERIC buttons or UP/DOWN ARROW button, instant service list will be displayed. Select the desired service by using the ARROW button, and press OK button to watch. You can also enter the service number directly by using the NUMERIC button.
23 1.4 Using Recent Service List To display recent service list, press the RECALL button for a short time. To return to the previous service that you were watching, press RECALL button twice or for a longer time. Choose the service from the recent service list, use the ARROW button to select, and then press the OK button. Press EXIT button to exit from the recent service list. 2. Information Window If you want to view the information of the current service that you are watching, press INFO button. Then the Information window will be displayed. This Information window is automatically displayed when changing between the services. This window contains much useful information such as service number, service name, scrambled types of service, teletext, subtitle, Audio indication for Dolby Digital, Time duration of the service and so on. By pressing INFO button once again, you can get more detailed information about the service. 3. Multi-Picture Display. Press the BLUE button to display multiple pictures and use the RED button to select the display options for 9 or 12 multiple pictures. 4. Electronic Program Guide (EPG) Electronic Program Guide (EPG) allows you to see program schedule and program information from the service which includes this data as part of their transmission. Multiple services will be shown with a time line of programming events. The EPG supplies additional information of channel service, such as program listings, start/end times and detailed information about the program listings for all available services. The availability and details of information of these program details can be varied, depending on the particular broadcasters, individual services.
24 Press the EPG button, then the EPG menu will be displayed. Use the ARROW buttons to move to other services or to see previous/next guide. Press the EPG button once to view full EPG with multi service list, and press it twice to view the additional EPG information of a specific channel service. Keep pressing the EPG button to toggle between the full and detailed menus of EPG. Press the GREEN button to view next day EPG and the RED button to view EPG for a previous day. Select the program by using the ARROW buttons then set the event timer by pressing OK. You can schedule a recording with the EPG menu as follows. - Press RECORD button to schedule the event. This schedule can be checked in the menu of Timer Settings, in the System tool menu. - To cancel the schedule of the recording, press the OK button for the appointed event. - To edit the schedule of the recording, press the RECORD button for the appointed event. 5. Favorite Group Press the FAV(Favorite) button to view all favorite groups such as sports, movie, drama, satellite group and so on. Scroll through the various favorite group using the UP/DOWN ARROW buttons, and select the desired favorite group by pressing OK button. 6. Volume Control To adjust the audio volume, press the VOL UP/ DOWN buttons. Audio volume control bar will be displayed at the top of the screen and disappear after 4 seconds. When necessary, press the MUTE button to turn on/off the audio sound. NOTE : The mute function remains set while you change services. 7. Pause PAUSE button is used to freeze the video. Press PAUSE button once more to resume the video.
25 8. Subtitle You can select the language for a Subtitle, if the program provides subtitle information. Press the SUBTITLE button on your remote control unit. Select the desired subtitle language then press OK button. The subtitle will be displayed in the selected language at the bottom of the screen. To turn OFF the subtitle from the screen, Select Off from the subtitle language list. NOTE : When program does not provide subtitle information, SUBTITLE button will not be active. 9. Audio Control Press YELLOW button on live TV service to display Audio Control menu. You can set Audio Track / Sound Mode / Sound Level. Audio Track : You can see all the audio track of the service you are watching. Use the ARROW buttons to choose the preferred audio track. If you select Auto, audio track will play as what you set for audio language in language setting menu. Sound Mode : To set sound mode, Stereo / Mono / Left / Right. Sound Level : To set sound level, Low(-30%) / Normal / High(+30%) / Off.
26 10. Teletext When the TELETEXT icon on the INFO Banner, press the TELETEXT button to view the teletext. 11. PIP (Picture in Picture) When you press the PIP button, a sub picture screen will appear on the main screen view. If you press the PIP button one more time, the primary picture and the sub picture will appear together side-by-side with the same size. The picture of the left side is the primary and the picture on the right side is sub. If you press the PIP button one more time, the sub picture will disappear. In the PIP mode, you can change primary and sub with the PIP SWAP button.
27 If you press the PAGE UP/DOWN button, the location of the sub picture is changed. If you press the PIP SERVICE LIST button, you can see the list of services of sub picture. You can change the service of the sub picture from the service list shown. NOTE : Changing services of sub the picture could be limited by the condition of the tuner connection or a recording event ongoing.
28 PVR (Personal Video Recorder) Function 1. Recording You can select a recording storage device with the following sequence : Menu > Configuration > Recording Option > Record Device. Default is set to Hard Disk. 1.1 Recording methods There are 3 type recording methods. (Instant Recording / Time Scheduled Recording / Event Scheduled Recording). Instant Recording : You may press the RECORD button to start your recording instantly at anytime. Time Scheduled Recording : - In Timer Settings menu, you may set the time & program to record your desired service program. (Go to Main Menu > System Tools > Timer Settings) - Press the GREEN button to activate the new timer edit screen. - In the Timer Edit screen, you may choose start date/time, duration, service, mode, type (Recording/Play), Tuner (Auto/1/2) then simply press the Yes button to schedule your recording event. Please note that the minimum offset time of 3 minutes is required from the Start time & current time for appropriate recording process to take place.
29 Event Scheduled Recording via EPG : - In the EPG menu screen, you can choose the event you wish to schedule or record. - While watching the LIVE TV screen, press the EPG button to access the EPG menu screen. - Go to the event which you wish to view at the time indicated on the EPG schedule, then press OK. The event will be scheduled with the BLUE play icon. This BLUE play icon means that you want to just watch the event at the scheduled time. - Press the OK button one more time, then the event will be scheduled with the RED dot icon. This RED dot icon means that you want to record the event at the scheduled time. - When you set an event for scheduled recording via the EPG menu. It automatically sets a Timer Event in the Main Menu > System Tools > Timer Settings.
30 1.2 Recording Edit Press the REC button while recording to see the recording message window. Pause : Select Pause Recording then press OK to pause the current recording process. Duration : Set recording duration. Press LEFT/RIGHT ARROW button to change recording duration. Stop Position : Set the finishing time of recording. - End of current event : finish recording at the end of current event - End of next event : finish recording at the end of next event. - Not Available : EPG is not available. Record Slot : When you are recording 3 services, you can select Primary / Secondary / Tertiary by pressing Left/Right Arrow button, then go to Change Service and press OK button to show that recording service. 1.3 Long Time recording During lengthy time recording processes of 4GB(Giga Byte) or more, additional files may be created per every 4GB. (For example; aaa.ts, aaa.ts1, aaa.ts2 and so on). You must remember not to delete any of duplicated file. These files are only able to be viewed with your PC not with the receiver (STB). 1.4 Pause during recording When the PAUSE button is pressed during recording, only the live video is paused, but recording is continued at the selected recording device. (Menu > Configuration > Recording Option > Record Device)
31 Press PAUSE button once again and event will resume from the pause time. During recording, press the PLAY/TIMESHIFT button to show the Play bar screen. While the Play bar is shown on your screen, you may use the LEFT/RIGHT Arrow button to move (forward & backward) freely within recorded time. If you press YELLOW button in the Play bar, you can set the Position Jump time at Auto / 10sec / 30sec / 1min / 2min / 4min / 10min. Then press LEFT/RIGHT Arrow button to jump as you set the time. If you press the STOP button, it will go to LIVE and you may press PREV FILE button to view the recorded file from the beginning. STB can record up to 3 different services simultaneously. When recording 3 services at the same time, you can press the STOP button to see a message window of current recording status / information. If you select one of the 3 or 2 recordings and press the OK button, that recording service will be stopped. If you press the STOP button during recording 1 service, a recording stop message window will appear. Then select YES to stop recording. NOTE : If you want the recording up to 3 services, please format the storage devise with 'Journaled(JFS)' file system. Menu > Storage Manager > Format > File System > select 'Journaled(JFS)'.
Support Manual HoistLocatel Electronic Locks
 Support Manual HoistLocatel Electronic Locks 1. S70, Create a Terminating Card for Cards Terminating Card 2. Select the card you want to block, look among Card No. Then click on the single arrow pointing
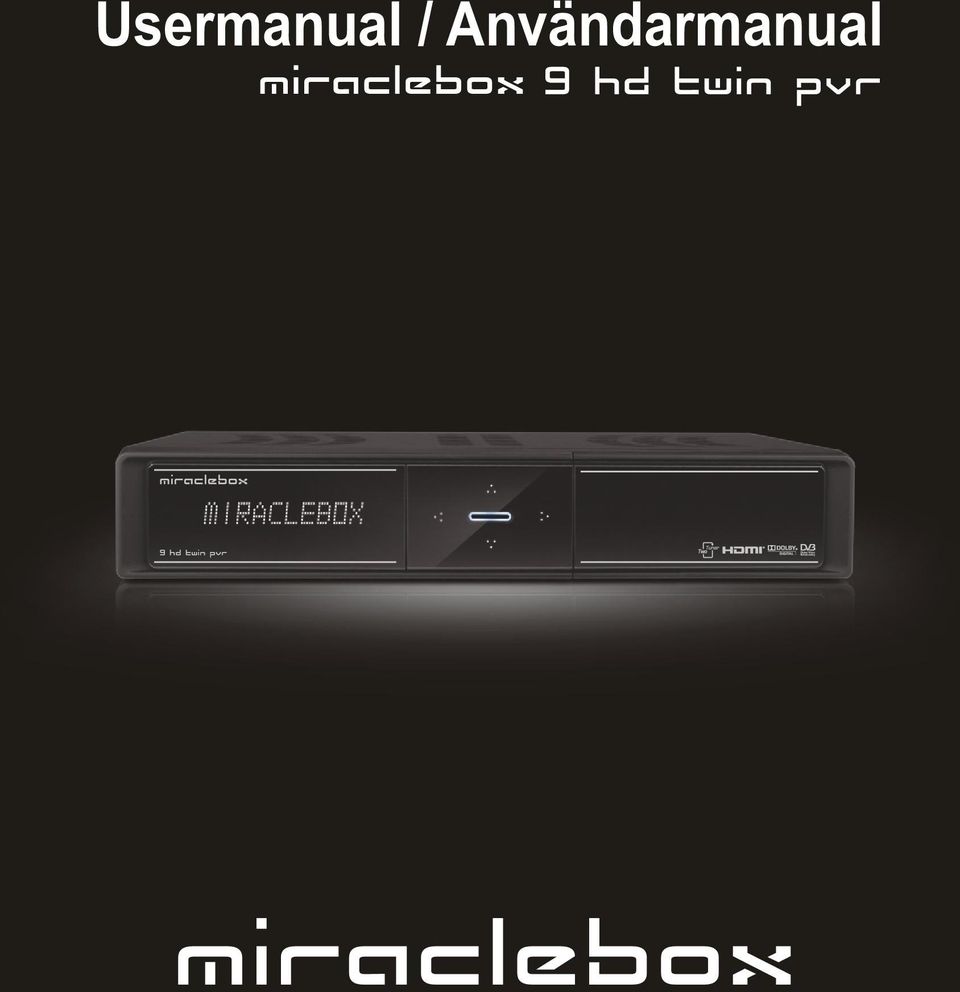
HD Satellite Recorder Digital Innovation Life. User's Manual. Miraclebox 8 HD PVR
 HD Satellite Recorder Digital Innovation Life User's Manual Miraclebox 8 HD PVR INDEX INDEX... 3 Precautions... 5 1. Important Safety Instructions... 5 2. Notice... 5 3. Copyright... 6 4. Disclaimer...
Beijer Electronics AB 2000, MA00336A, 2000-12
 Demonstration driver English Svenska Beijer Electronics AB 2000, MA00336A, 2000-12 Beijer Electronics AB reserves the right to change information in this manual without prior notice. All examples in this
Quick Start Guide. To switch the TV on. cable to connect the two units together. To select the TV broadcasts. To HDMI connection on.
 Quick Start Guide 1 Insert the batteries into the remote control Lift the cover on the back of the remote upward gently. Install two AAA batteries. Make sure to match the + and - ends of the batteries
Boiler with heatpump / Värmepumpsberedare
 Boiler with heatpump / Värmepumpsberedare QUICK START GUIDE / SNABBSTART GUIDE More information and instruction videos on our homepage www.indol.se Mer information och instruktionsvideos på vår hemsida
InstalationGuide. English. MODEL:150NHighGain/30NMiniUSBAdapter
 miraclebox miraclewifi InstalationGuide English MODEL:150NHighGain/30NMiniUSBAdapter ENGLISH MIRACLE WIFI 150N & 300N USERMANUAL MIRACLEBOX.SE 1 ENGLISH Table of Contents Package Contents... 3 System Requirements
Quick Start Guide Snabbguide
 Quick Start Guide Snabbguide C Dictionary Quick Start Thank you for choosing C Dictionary and C-Pen as your translation solution. C Dictionary with its C-Pen connection will make translation easy and enable
2.45GHz CF Card Reader User Manual. Version /09/15
 2.45GHz CF Card Reader User Manual Version 2.0 2008/09/15 Install SYRD245-CF Card Reader to PDA: 1. Explorer SYRD245-CF folder of SYRIS Xtive CD-ROM 2. Check your PDA OS (Mobile5 or PPC2003) NETCF V2 currently
electiaprotect GSM SEQURITY SYSTEM Vesta EZ Home Application SMART SECURITY SYSTEMS! SVENSKA ios... 2-4 Android... 5-7
 GSM SEQURITY SYSTEM Vesta EZ Home Application SVENSKA ios... 2-4 Android... 5-7 ENGLISH ios... 8-10 Android... 11-13 electiaprotect SMART SECURITY SYSTEMS! 1.1. Vesta EZ Home för ios Vesta EZ Home för
INSTALLATION INSTRUCTIONS
 INSTALLATION - REEIVER INSTALLATION INSTRUTIONS RT0 RF WIRELESS ROOM THERMOSTAT AND REEIVER MOUNTING OF WALL MOUTING PLATE - Unscrew the screws under the - Pack contains... Installation - Receiver... Mounting
2.1 Installation of driver using Internet Installation of driver from disk... 3
 &RQWHQW,QQHKnOO 0DQXDOÃ(QJOLVKÃ'HPRGULYHU )RUHZRUG Ã,QWURGXFWLRQ Ã,QVWDOOÃDQGÃXSGDWHÃGULYHU 2.1 Installation of driver using Internet... 3 2.2 Installation of driver from disk... 3 Ã&RQQHFWLQJÃWKHÃWHUPLQDOÃWRÃWKHÃ3/&ÃV\VWHP
Installation Instructions
 Installation Instructions (Cat. No. 1794-IE8 Series B) This module mounts on a 1794 terminal base unit. 1. Rotate keyswitch (1) on terminal base unit (2) clockwise to position 3 as required for this type
1. Unpack content of zip-file to temporary folder and double click Setup
 Instruktioner Dokumentnummer/Document Number Titel/Title Sida/Page 13626-1 BM800 Data Interface - Installation Instructions 1/8 Utfärdare/Originator Godkänd av/approved by Gäller från/effective date Mats
Preschool Kindergarten
 Preschool Kindergarten Objectives CCSS Reading: Foundational Skills RF.K.1.D: Recognize and name all upper- and lowercase letters of the alphabet. RF.K.3.A: Demonstrate basic knowledge of one-toone letter-sound
Isolda Purchase - EDI
 Isolda Purchase - EDI Document v 1.0 1 Table of Contents Table of Contents... 2 1 Introduction... 3 1.1 What is EDI?... 4 1.2 Sending and receiving documents... 4 1.3 File format... 4 1.3.1 XML (language
Integrated Remote Commander
 2-588-610-11(1) Integrated Remote Commander Operating Instructions Bruksanvisning GB RM-AV2500T 2005 Sony Corporation 2GB Features The RM-AV2500T Remote Commander provides centralized control of all your
 Bänkvåg LCW-6S Manual/Förenklat handhavande User Manual LCW-6S www.liden-weighing.se Knappfunktioner: ON/OFF Sätter på och stänger av vågen. UNIT Skiftar vägningsenhet ZERO/TARE Nollställer vågen Tarerar
How to format the different elements of a page in the CMS :
 How to format the different elements of a page in the CMS : 1. Typing text When typing text we have 2 possible formats to start a new line: Enter - > is a simple line break. In a paragraph you simply want
Problem som kan uppkomma vid registrering av ansökan
 Problem som kan uppkomma vid registrering av ansökan Om du har problem med din ansökan och inte kommer vidare kan det bero på det som anges nedan - kolla gärna igenom detta i första hand. Problem vid registrering
Instruction Manual. Svenska, English. Power Bank. Model: PRBN
 Instruction Manual Svenska, English Power Bank Model: PRBN Innehåll / Content Innehåll Säkerhetsföreskrifter... 4 Delar... 5 Specifikationer... 6 Miljö / Lag och säkerhet / Förbehåll... 7 Content Safety
SAFETY PRECAUTIONS SPECIFICATIONS
 SAFETY PRECAUTIONS Read the instructions carefully before use and save them for future reference. Before you connect the appliance: Ensure that the voltage rating on the type plate corresponds to your
PRESS FÄLLKONSTRUKTION FOLDING INSTRUCTIONS
 PRESS FÄLLKONSTRUKTION FOLDING INSTRUCTIONS Vänd bordet upp och ner eller ställ det på långsidan. Tryck ner vid PRESS och fäll benen samtidigt. Om benen sitter i spänn tryck benen mot kortsidan före de
DTR 520 Digital Terrestrial Receiver
 DTR 520 Digital Terrestrial Receiver Operating instructions Operating instructions Contents Contents...3 General information...4 Safety and installation information...4 Controls, displays and connections...6
Quick Start. English Svenska. Moca
 Quick Start English Svenska Moca 2015-08-20 Before Printing Install the printer according to the supplier s instructions, please see the Moca user guide (chapter 3-1) at the installation CD. Choose Moca
SAFETY PRECAUTIONS SPECIFICATIONS
 SAFETY PRECAUTIONS Read the instructions carefully before use and save them for future reference. Before you connect the appliance: Ensure that the voltage rating on the type plate corresponds to your
Windlass Control Panel v1.0.1
 SIDE-POWER Windlass Systems 86-08950 Windlass Control Panel v1.0.1 EN Installation manual Behåll denna manual ombord! S Installations manual SLEIPNER AB Kilegatan 1 452 33 Strömstad Sverige Tel: +46 525
PRESS FÄLLKONSTRUKTION FOLDING INSTRUCTIONS
 PRESS FÄLLKONSTRUKTION FOLDING INSTRUCTIONS Vänd bordet upp och ner eller ställ det på långsidan. Tryck ner vid PRESS och fäll benen samtidigt. OBS! INGA STORA KRAFTER KRÄVS!! Om benen sitter i spänn tryck
BBT057/ BBC057 BBCD057/ BBT057-NL HOLDEN COLORADO 9/2016+ HOLDEN TRAILBLAZER WD & 4WD Models
 INSTALLATION GUIDE BBT057/ BBC057 BBCD057/ BBT057-NL HOLDEN COLORADO 9/2016+ HOLDEN TRAILBLAZER 2017+ 2WD & 4WD Models Ironman 4x4 BBT/ BBC/ BBCD/BBT057-NL Bull Bars fit to a Holden Colorado 9/2016+ It
Översättning av galleriet. Hjälp till den som vill...
 Hjälp till den som vill... $txt['aeva_title'] = 'Galleri'; $txt['aeva_admin'] = 'Admin'; $txt['aeva_add_title'] = 'Titel'; $txt['aeva_add_desc'] = 'Beskrivning'; $txt['aeva_add_file'] = 'Fil att ladda
Alias 1.0 Rollbaserad inloggning
 Alias 1.0 Rollbaserad inloggning Alias 1.0 Rollbaserad inloggning Magnus Bergqvist Tekniskt Säljstöd Magnus.Bergqvist@msb.se 072-502 09 56 Alias 1.0 Rollbaserad inloggning Funktionen Förutsättningar Funktionen
Monitor Audio ASB 2. Soundbar. Monitor Audios Nya soundbar är här! Den ultimata högtalaren för din tv. Monitor Audios soundbar är här!
 Monitor Audio ASB 2 Soundbar Monitor Audios Nya soundbar är här! Den ultimata högtalaren för din tv Monitor Audios soundbar är här! Den ultimata högtalaren för din tv. Den första riktiga soundbaren som
Viktig information för transmittrar med option /A1 Gold-Plated Diaphragm
 Viktig information för transmittrar med option /A1 Gold-Plated Diaphragm Guldplätering kan aldrig helt stoppa genomträngningen av vätgas, men den får processen att gå långsammare. En tjock guldplätering
Får endast utföras av behörig personal. May only be carried out by authorized electrician
 Instruktion för DMIS Instruction for DMIS FLE400FC, FLE850MP, W3400H, W4400H/W4600H (-980/1287) W3850H/W31100H, W4850/W41100H (-1220/636) Clarus Control 471 1530-75 2016.05.04 Får endast utföras av behörig
LIVING LV22 EN - OWNERS MANUAL
 LIVING LV22 EN - OWNERS MANUAL 1 www.audiopro.com www.audiopro.se Audio Pro AB Sverige Audio Pro, Audio Pro logotypen, a symbolen, och ace-bass är registrerade varumärken av Audio Pro AB, Sverige. Alla
Contents. English - 1 -
 Contents Features... 2 Introduction... 2 Preparation... 2 Safety Precautions... 2 Package Contents... 4 Remote Control Buttons... 5 LCD TV and Operating Buttons... 6 Viewing the Back side Connections...
Schenker Privpak AB Telefon VAT Nr. SE Schenker ABs ansvarsbestämmelser, identiska med Box 905 Faxnr Säte: Borås
 Schenker Privpak AB Interface documentation for web service packageservices.asmx 2012-09-01 Version: 1.0.0 Doc. no.: I04304b Sida 2 av 7 Revision history Datum Version Sign. Kommentar 2012-09-01 1.0.0
Webbregistrering pa kurs och termin
 Webbregistrering pa kurs och termin 1. Du loggar in på www.kth.se via den personliga menyn Under fliken Kurser och under fliken Program finns på höger sida en länk till Studieöversiktssidan. På den sidan
Lösenordsportalen Hosted by UNIT4 For instructions in English, see further down in this document
 Lösenordsportalen Hosted by UNIT4 For instructions in English, see further down in this document Användarhandledning inloggning Logga in Gå till denna webbsida för att logga in: http://csportal.u4a.se/
IMPORTANT! RETAIN FOR FUTURE REFERENCE PLEASE READ CAREFULLY VIKTIGT! BEHÅLL FÖR FRAMTIDA REFERENSLÄS IGENOM INSTRUKTIONSMANUALEN NOGGRANT
 13060 Basic Cot One Instruction Manual Instruktion Manual IMPORTANT! RETAIN FOR FUTURE REFERENCE PLEASE READ CAREFULLY VIKTIGT! BEHÅLL FÖR FRAMTIDA REFERENSLÄS IGENOM INSTRUKTIONSMANUALEN NOGGRANT Thank
IRAB Mottagare sida 2-5 Tele Radio AB Mottagare sida 6
 IRAB Mottagare sida -5 Tele Radio AB Mottagare sida 6 Installation of receiver type smd 700 4 RELAY FUNCTIONS / -4 VAC/DC PCB TYPE NO: LWEG 4L Rev: 95-09 Installation: Install the receivers in a protected
Information technology Open Document Format for Office Applications (OpenDocument) v1.0 (ISO/IEC 26300:2006, IDT) SWEDISH STANDARDS INSTITUTE
 v1.0 (ISO/IEC 26300:2006, IDT) SWEDISH STANDARDS INSTITUTE") SVENSK STANDARD SS-ISO/IEC 26300:2008 Fastställd/Approved: 2008-06-17 Publicerad/Published: 2008-08-04 Utgåva/Edition: 1 Språk/Language: engelska/english ICS: 35.240.30 Information technology Open Document
SVENSK STANDARD SS-ISO/IEC 26300:2008 Fastställd/Approved: 2008-06-17 Publicerad/Published: 2008-08-04 Utgåva/Edition: 1 Språk/Language: engelska/english ICS: 35.240.30 Information technology Open Document
Varmt välkommen som gästföreläsare till Juridiska fakulteten vid Lunds universitet
 Varmt välkommen som gästföreläsare till Juridiska fakulteten vid Lunds universitet I samtliga salar finns en dator (tunn klient) med både skärm och projektor. Klienterna kan köra följande program: Adobe
Installationsguide. EG200 Multi WAN Residential Gateway. v
 Installationsguide v. 2018-11-29 1 STATUS 3 5 2 4 WAN INTERNET Ovansida WIFI ETHERNET Baksida 7 TELE 6 8 WPS EXT Den här installationsguiden hjälper dig att installera Inteno. kopplas in i ditt Ethernet-baserade
Manual. Video Tour:
 Manual Produkt: WIFI Group Controller (Enheten) Beskrivning Denna styrenhet har stöd för IOS 6.0 och Android 2.2 och senare operativsystem. Den kan fjärrstyra olika funktioner: tända ljus, justera ljusstyrka,
IMPORTANT! RETAIN FOR FUTURE REFERENCE PLEASE READ CAREFULLY VIKTIGT! BEHÅLL FÖR FRAMTIDA REFERENS LÄS IGENOM INSTRUKTIONSMANUALEN
 Heart & Stripes Junior Bed Instructions Manual Instruktions Manual IMPORTANT! RETAIN FOR FUTURE REFERENCE PLEASE READ CAREFULLY VIKTIGT! BEHÅLL FÖR FRAMTIDA REFERENS LÄS IGENOM INSTRUKTIONSMANUALEN Thank
Digital Video Recorder
 V110707 d i g i t a l - l a b s Digital Video Recorder En Fi Sv FTA Communication Technologies S.a.r.l 11, rue Pierre Werner, L-6832 Betzdorf, Luxembourg www.inverto.tv, E-mail: info@inverto.tv IDL 7000m
Product configurations Produire configuration Produkt konfigurationen Producto configuraciones Produkt konfigurationerna
 Product configurations Produire configuration Produkt konfigurationen Producto configuraciones Produkt konfigurationerna 1 2 3 Ref. 3800 2360, Ver 2005-09 2 1. Keypad K900; includes TOM-Net terminators.
 BÄNKVÅG / BENCH SCALE Modell : SW-III / Model : SW-III ANVÄNDARMANUAL / USER MANUAL SW-III WWW.LIDEN-WEIGHING.SE 2014-03-26 OBS! Under vågen sitter en justerbar skruv (se bild). Standardinställning är
Styrteknik: Binära tal, talsystem och koder D3:1
 Styrteknik: Binära tal, talsystem och koder D3:1 Digitala kursmoment D1 Boolesk algebra D2 Grundläggande logiska funktioner D3 Binära tal, talsystem och koder Styrteknik :Binära tal, talsystem och koder
Plain A262. För T16 (T5) lysrör. Innehåll. Monteringsanvisning. A. Instruktion för rampmontering
 lysrör. Innehåll. Monteringsanvisning. A. Instruktion för rampmontering") Plain A262 För T16 (T5) lysrör Innehåll Ramparmatur: ändmodul En stängd gavel/ en öppen gavel Plint i båda ändarna Överkopplingssladd 1 rampgavel 1 lysrörsbytare Ramparmatur: mellanmodul Plint i en ände
Plain A262 För T16 (T5) lysrör Innehåll Ramparmatur: ändmodul En stängd gavel/ en öppen gavel Plint i båda ändarna Överkopplingssladd 1 rampgavel 1 lysrörsbytare Ramparmatur: mellanmodul Plint i en ände
IPCorder KNR-412 Installation manual
 IPCorder KNR-412 Installation manual September 28, 2008 2 Contents 1 Installation 5 1.1 Package contents......................................... 5 1.2 Disk installation.........................................
Manual/Förenklad handhavande User Manual. LPW-Serien.
 Manual/Förenklad handhavande User Manual LPW-Serien www.liden-weighing.se Svenska INNEHÅLL 1. INLEDNING... 2 2. BESKRIVNING... 2 Tangentbord... 3 Display.....4 3. Användning.....4 3.1 Grundläggande Användning..4
WhatsApp finns för dessa plattformar:
 WhatsApp finns för dessa plattformar: Hur funkar det? WhatsApp Messenger is a cross-platform mobile messaging app which allows you to exchange messages without having to pay for SMS. WhatsApp Messenger
Resurser. Visa sidan Hjälpguide. Menykarta. Phaser 4400 laserskrivare
 Phaser 4400 laserskrivare Resurser En stor mängd information finns samlad i skrivaren som utskrivbara sidor. På följande sidor visas Hjälpguiden, en utskrivbar sida över resurser för att få hjälp. P4400-77
Quick Start. English Svenska PRIMACY. Printing settings and winsign
 Quick Start English Svenska PRIMACY Printing settings and winsign 2016-05-26 Before Printing Quick Start Primacy Install the printer according to the supplier s instructions, please see the PRIMACY user
Webbreg öppen: 26/ /
 Webbregistrering pa kurs, period 2 HT 2015. Webbreg öppen: 26/10 2015 5/11 2015 1. Du loggar in på www.kth.se via den personliga menyn Under fliken Kurser och under fliken Program finns på höger sida en
Materialplanering och styrning på grundnivå. 7,5 högskolepoäng
 Materialplanering och styrning på grundnivå Provmoment: Ladokkod: Tentamen ges för: Skriftlig tentamen TI6612 Af3-Ma, Al3, Log3,IBE3 7,5 högskolepoäng Namn: (Ifylles av student) Personnummer: (Ifylles
 BÄNKVÅG / BENCH SCALE ANVÄNDARMANUAL / USER MANUAL SW-III www.liden-weighing.com Svenska OBS! Under vågen sitter en justerbar skruv (se bild). Standardinställning är den för vägning. Om ni vill rengöra
Installation av F13 Bråvalla
 Website: http://www.rbdesign.se Installation av F13 Bråvalla RBDESIGN FREEWARE - ESCK Norrköping-Bråvalla 1. Ladda ner och packa upp filerna i en mapp som du har skapat på ett lättöverskådligt ställe utanför
Michael Q. Jones & Matt B. Pedersen University of Nevada Las Vegas
 Michael Q. Jones & Matt B. Pedersen University of Nevada Las Vegas The Distributed Application Debugger is a debugging tool for parallel programs Targets the MPI platform Runs remotley even on private
Vässa kraven och förbättra samarbetet med hjälp av Behaviour Driven Development Anna Fallqvist Eriksson
 Vässa kraven och förbättra samarbetet med hjälp av Behaviour Driven Development Anna Fallqvist Eriksson Kravhantering På Riktigt, 16 maj 2018 Anna Fallqvist Eriksson Agilista, Go See Talents linkedin.com/in/anfaer/
Uttagning för D21E och H21E
 Uttagning för D21E och H21E Anmälan till seniorelitklasserna vid O-Ringen i Kolmården 2019 är öppen fram till och med fredag 19 juli klockan 12.00. 80 deltagare per klass tas ut. En rangordningslista med
Installationsguide. DG200 Multi WAN Residential Gateway V
 Installationsguide Multi WAN Residential Gateway V. 2018-07-9 Multi WAN Residential Gateway Ovansida 1 3 5 7 STATUS INTERNET TELE 2 4 6 8 WAN WIFI WPS EXT Baksida USB DSL LAN1 LAN2 LAN3 LAN4 WAN TEL2 TEL1
User Manual ULTRA-DI DI20. Professional Active 2-Channel DI-Box/Splitter
 User Manual ULTRA-DI DI20 Professional Active 2-Channel DI-Box/Splitter 2 ULTRA-DI DI20 Innehållsförteckning Tack själv... 2 Warranty... 3 Legal Disclaimer... 4 Limited warranty... 5 1. Välkommen till
81152 TRANSFER CASE SHIFT HANDLE
 Installation Instructions for TRANSFER CASE SHIFT HANDLE for 2007 2018 JEEP JK WRANGLER 1 2 3 ITEM NO. PART NO. DESCRIPTION QTY. 1 4101359 SHIFT KNOB, JEEP WRANGLER JK, MOLDED 1 2 1794720 JAM NUT, 3/8
Schenker Privpak AB Telefon 033-178300 VAT Nr. SE556124398001 Schenker ABs ansvarsbestämmelser, identiska med Box 905 Faxnr 033-257475 Säte: Borås
 Schenker Privpak AB Interface documentation for web service packageservices.asmx 2010-10-21 Version: 1.2.2 Doc. no.: I04304 Sida 2 av 14 Revision history Datum Version Sign. Kommentar 2010-02-18 1.0.0
IDL7000M CCX User Manual
 V041007 d i g i t a l - l a b s Digital Video Recorder En Fi Sv FTA Communication Technologies S.a.r.l 11, rue Pierre Werner, L-6832 Betzdorf, Luxembourg www.inverto.tv, E-mail: info@inverto.tv 7000m CCX
HANTERING AV UPS CX
 HANTERING AV UPS CX2100-0904 Hantering av UPS-modulen CX2100-0904. I WES7 och TwinCAT 2. Inställning av UPS:en i WES7 UPS:ens konfigurationsflik Inställningsmöjligheterna för hur UPS:en beter sig finns
Lehigh Valley Hospital Schuylkill Portal User Q&A
 Lehigh Valley Hospital Schuylkill Portal User Q&A 1. How do I get assistance if I have difficulty accessing the portal or navigating the portal? 2. How do I save information on the portal for my personal
ARC 32. Tvättställsblandare/Basin Mixer. inr.se
 ARC 32 Tvättställsblandare/Basin Mixer inr.se SE Användning och skötsel Manualen är en del av produkten. Bevara den under hela produktens livscykel. Vi rekommenderar er att noggrant läsa igenom manualen
Dokumentnamn Order and safety regulations for Hässleholms Kretsloppscenter. Godkänd/ansvarig Gunilla Holmberg. Kretsloppscenter
 1(5) The speed through the entire area is 30 km/h, unless otherwise indicated. Beware of crossing vehicles! Traffic signs, guardrails and exclusions shall be observed and followed. Smoking is prohibited
Support for Artist Residencies
 1. Basic information 1.1. Name of the Artist-in-Residence centre 0/100 1.2. Name of the Residency Programme (if any) 0/100 1.3. Give a short description in English of the activities that the support is
User manual English Svenska. SPB 2.3 Digital TV box
 User manual English Svenska SPB 2.3 Digital TV box Copyright This manual is the copyright of CI no 556520-4137. No part of this manual may be revised, copied or transmitted in any way without written permission
Komma igång med Adobe Presenter ver.7
 Komma igång med Adobe Presenter ver.7 (Adobes guide med tillägg av Tove Forslund, Lärcentret 7.2.2009) Adobe Presenter Presenter gör det möjligt att förbättra dina presentationer genom att Banda in eller
Application Note SW
 TWINSAFE DIAGNOSTIK TwinSAFE är Beckhoffs safety-lösning. En översikt över hur TwinSAFE är implementerat, såväl fysiskt som logiskt, finns på hemsidan: http://www.beckhoff.se/english/highlights/fsoe/default.htm?id=35572043381
Installation Instructions
 Installation Instructions (Catalog Number 1771-IL Series D) Use this document as a guide when installing the catalog number 1771-IL/D analog input module. The isolated analog input module is sensitive
VASSVIK FIXED STAND SE / ENG
 VASSVIK FIXED STAND SE / ENG SE VIKTIGT Läs noga igenom instruktionerna före användning och spar dessa för framtida bruk. VARNING: Barnets huvud bör inte ligga lägre än barnets kropp. Lägg inte till ytterligare
Integritetspolicy på svenska Integrity policy in English... 5
 Innehållsförteckning / Table of content Integritetspolicy på svenska... 2 In Vino Veritas... 2 Vilka vi är... 2 Vilka personuppgifter vi samlar in och varför vi samlar in dem... 2 Namninsamlingen... 2
Om oss DET PERFEKTA KOMPLEMENTET THE PERFECT COMPLETION 04 EN BINZ ÄR PRECIS SÅ BRA SOM DU FÖRVÄNTAR DIG A BINZ IS JUST AS GOOD AS YOU THINK 05
 Om oss Vi på Binz är glada att du är intresserad av vårt support-system för begravningsbilar. Sedan mer än 75 år tillverkar vi specialfordon i Lorch för de flesta olika användningsändamål, och detta enligt
DIGITAL CABLE RECEIVER DC-230HD
 DIGITAL CABLE RECEIVER DC-230HD BRUKSANVISNING Vänligen läs noga igenom manualen innan du ansluter din box INNEHÅLL 1 SÄKERHET... 3 2 SNABBINSTALLATION... 4 3 SPECIFIKATION... 6 4 INKOPPLING AV MOTTAGARE...
English Svenska. Installation. Guide. XG6846 Broadband Switch
 English Svenska Installation Guide Broadband Switch 2 Installation Guide English Svenska Broadband Switch Language Page English... 4 Svenska... 8 3 Broadband Switch USB (OPTIONAL) (OPTIONAL) Back/side
This manual should be saved! EcoFlush Manual. Wostman 2018:2
 This manual should be saved! EcoFlush Manual Wostman 2018:2 ENGLISH Important! This manual should be saved by the owner! It s important to read the whole manual before installation. EcoFlush gives the
BEAM. Product Manual Produktmanual
 BEAM Product Manual Produktmanual BEAM Technical Specifications Tekniska Specifikationer Description Product number Mode Voltage Current Vehicle interface Cable length Encapsulation Operating temperature
Grafisk teknik IMCDP IMCDP IMCDP. IMCDP(filter) Sasan Gooran (HT 2006) Assumptions:
 Sasan Gooran (HT 2006) Assumptions:") IMCDP Grafisk teknik The impact of the placed dot is fed back to the original image by a filter Original Image Binary Image Sasan Gooran (HT 2006) The next dot is placed where the modified image has its
IMCDP Grafisk teknik The impact of the placed dot is fed back to the original image by a filter Original Image Binary Image Sasan Gooran (HT 2006) The next dot is placed where the modified image has its
Grafisk teknik IMCDP. Sasan Gooran (HT 2006) Assumptions:
 Assumptions:") Grafisk teknik Sasan Gooran (HT 2006) Iterative Method Controlling Dot Placement (IMCDP) Assumptions: The original continuous-tone image is scaled between 0 and 1 0 and 1 represent white and black respectively
Grafisk teknik Sasan Gooran (HT 2006) Iterative Method Controlling Dot Placement (IMCDP) Assumptions: The original continuous-tone image is scaled between 0 and 1 0 and 1 represent white and black respectively
Surfaces for sports areas Determination of vertical deformation. Golvmaterial Sportbeläggningar Bestämning av vertikal deformation
 SVENSK STANDARD SS-EN 14809:2005/AC:2007 Fastställd/Approved: 2007-11-05 Publicerad/Published: 2007-12-03 Utgåva/Edition: 1 Språk/Language: engelska/english ICS: 97.220.10 Golvmaterial Sportbeläggningar
Rev C SE, GB. Manual Gewa Control Tool
 Rev C SE, GB Manual Gewa Control Tool Innehåll/Contents SE MANUAL GEWA CONTROL TOOL... 3 INLEDNING... 3 KOMPATIBLA PRODUKTER... 3 INSTALLERA GEWA CONTROL TOOL... 4 INKOPPLING AV IR-SÄNDARE TILL DATOR...
Blackwire 215/225. Analogt sladdheadset. Användarhandbok
 Blackwire 215/225 Analogt sladdheadset Användarhandbok Innehåll Välkommen 3 Vill du ha mer hjälp? 3 Det här finns i förpackningen 4 Sladdmonterade reglage 5 Sätta på dig headsetet 6 Justera huvudbågen
Bruksanvisning. Digital TV MODELS : Q261 I Q321 I Q320 I Q401 I Q401 I Q400 I Q421S I Q421H I Q501
 Bruksanvisning Digital TV MDELS : Q261 I Q321 I Q320 I Q401 I Q401 I Q400 I Q421S I Q421H I Q501 General Information Baksida Strömanslutning DVI Video / HDMI ingång D-SUB ingång DVI/D-SUB
Positioning System SCU-2370 SCU-9080 SCU-VAC
 Positioning System SCU-2370 SCU-9080 SCU-VAC Positioning System Copyright 2012 Samsung Techwin Co., Ltd. All rights reserved. Trademark is the registered logo of Samsung Techwin Co., Ltd. The name of this
Remote control Fjärrströmbrytare / Fjernstrømbryter
 Manual / Bruksanvisning / Bruksanvisning Remote control Fjärrströmbrytare / Fjernstrømbryter ENG SE NO Item. No. 9220-1070 ENG Thank you for choosing to purchase a product from Rusta! Read through the
TEXTURED EASY LOCK BLOCK INSTALLATION GUIDE. australianpaving.com.au
 TEXTURED EASY LOCK BLOCK INSTALLATION GUIDE 1800 191 131 australianpaving.com.au TEXTURED EASY LOCK BLOCK The Textured Easy Lock Block retaining wall system is the premium retaining wall product for near
3 rd October 2017
 3 rd October 2017 Failures of Scaffold False work Failures Form work Bursting Trench Support Failure Hoarding Failures Can be expensive and result in fatalities and serious injuries Cardiff
Användarhandbok. MHL to HDMI Adapter IM750
 Användarhandbok MHL to HDMI Adapter IM750 Innehåll Inledning...3 MHL to HDMI Adapter-översikt...3 Komma igång...4 Smart Connect...4 Uppgradera Smart Connect...4 Använda MHL to HDMI Adapter...5 Ansluta
Active Speaker System X-Line 50 AW
 Active Speaker System X-Line 50 AW Important Safety Information: Read all documentation before operating your equipment. Retain all documentation for future reference. Save the carton and packing material
This manual should be saved! EcoFlush Manual
 This manual should be saved! EcoFlush Manual ENGLISH Important! This manual should be saved by the owner! Read the whole manual before installation. The flush volumes are factory set at 2.5 / 0.3 liters.
BBT042/ BBC042/ BBCD042 NISSAN NAVARA D40 V STX & PATHFINDER R WD & 4WD Models
 INSTALLATION GUIDE BBT042/ BBC042/ BBCD042 NISSAN NAVARA D40 V6 2010+ STX & PATHFINDER R51 2010+ 2WD & 4WD Models Ironman 4x4 BBT/ BBC/ BBCD042 Bull Bars fit to a Nissan Navara D40 STX & Pathfinder R51.
FÖRBERED UNDERLAG FÖR BEDÖMNING SÅ HÄR
 FÖRBERED UNDERLAG FÖR BEDÖMNING SÅ HÄR Kontrollera vilka kurser du vill söka under utbytet. Fyll i Basis for nomination for exchange studies i samråd med din lärare. För att läraren ska kunna göra en korrekt
SUPPLIER EXTRANET. Manual. Institut für Interaktive Medien GmbH Spitalerstraße 10 D Hamburg T: F:
 SUPPLIER EXTRANET Manual Institut für Interaktive Medien GmbH Spitalerstraße 10 D-20095 Hamburg T: +49 40 33300-123 F: +49 40 3330099-123 info@iam-interactive.de www.iam-interactive.de Geschäftsführer:
http://marvel.com/games/play/31/create_your_own_superhero http://www.heromachine.com/
 Name: Year 9 w. 4-7 The leading comic book publisher, Marvel Comics, is starting a new comic, which it hopes will become as popular as its classics Spiderman, Superman and The Incredible Hulk. Your job